First month on site: from cut to finish in three containers
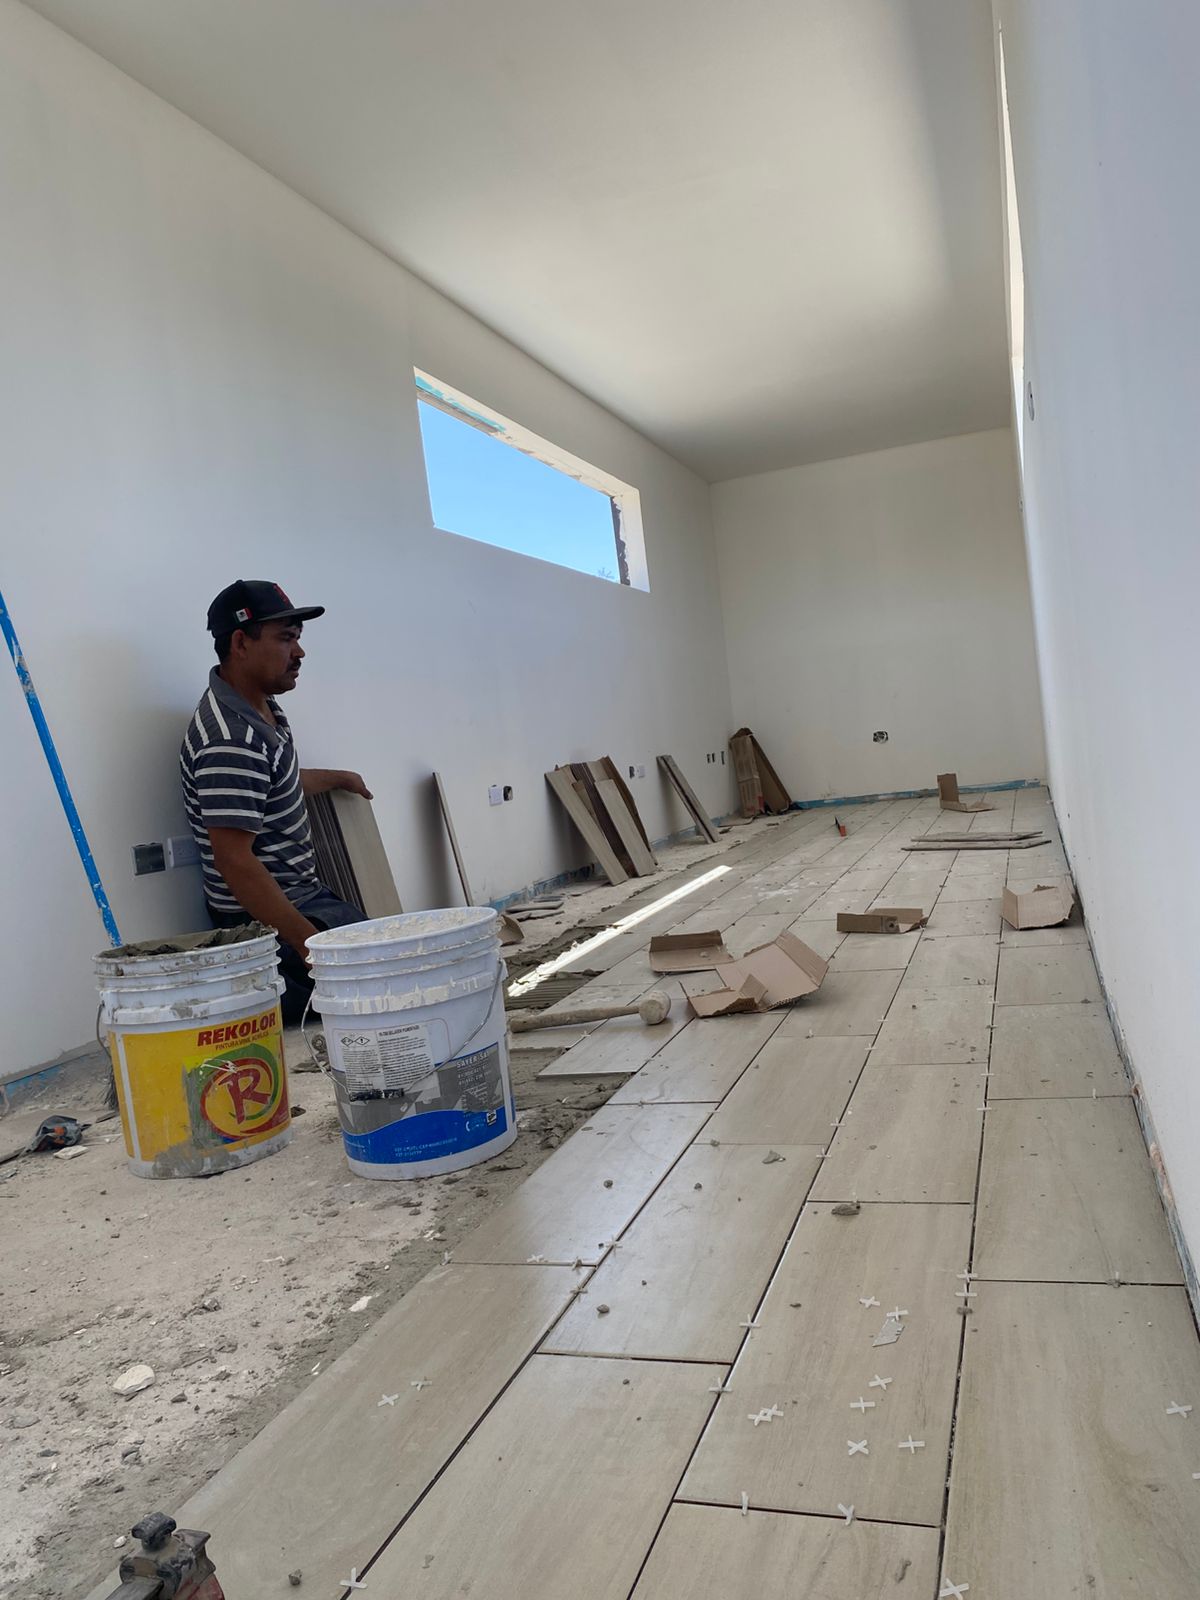
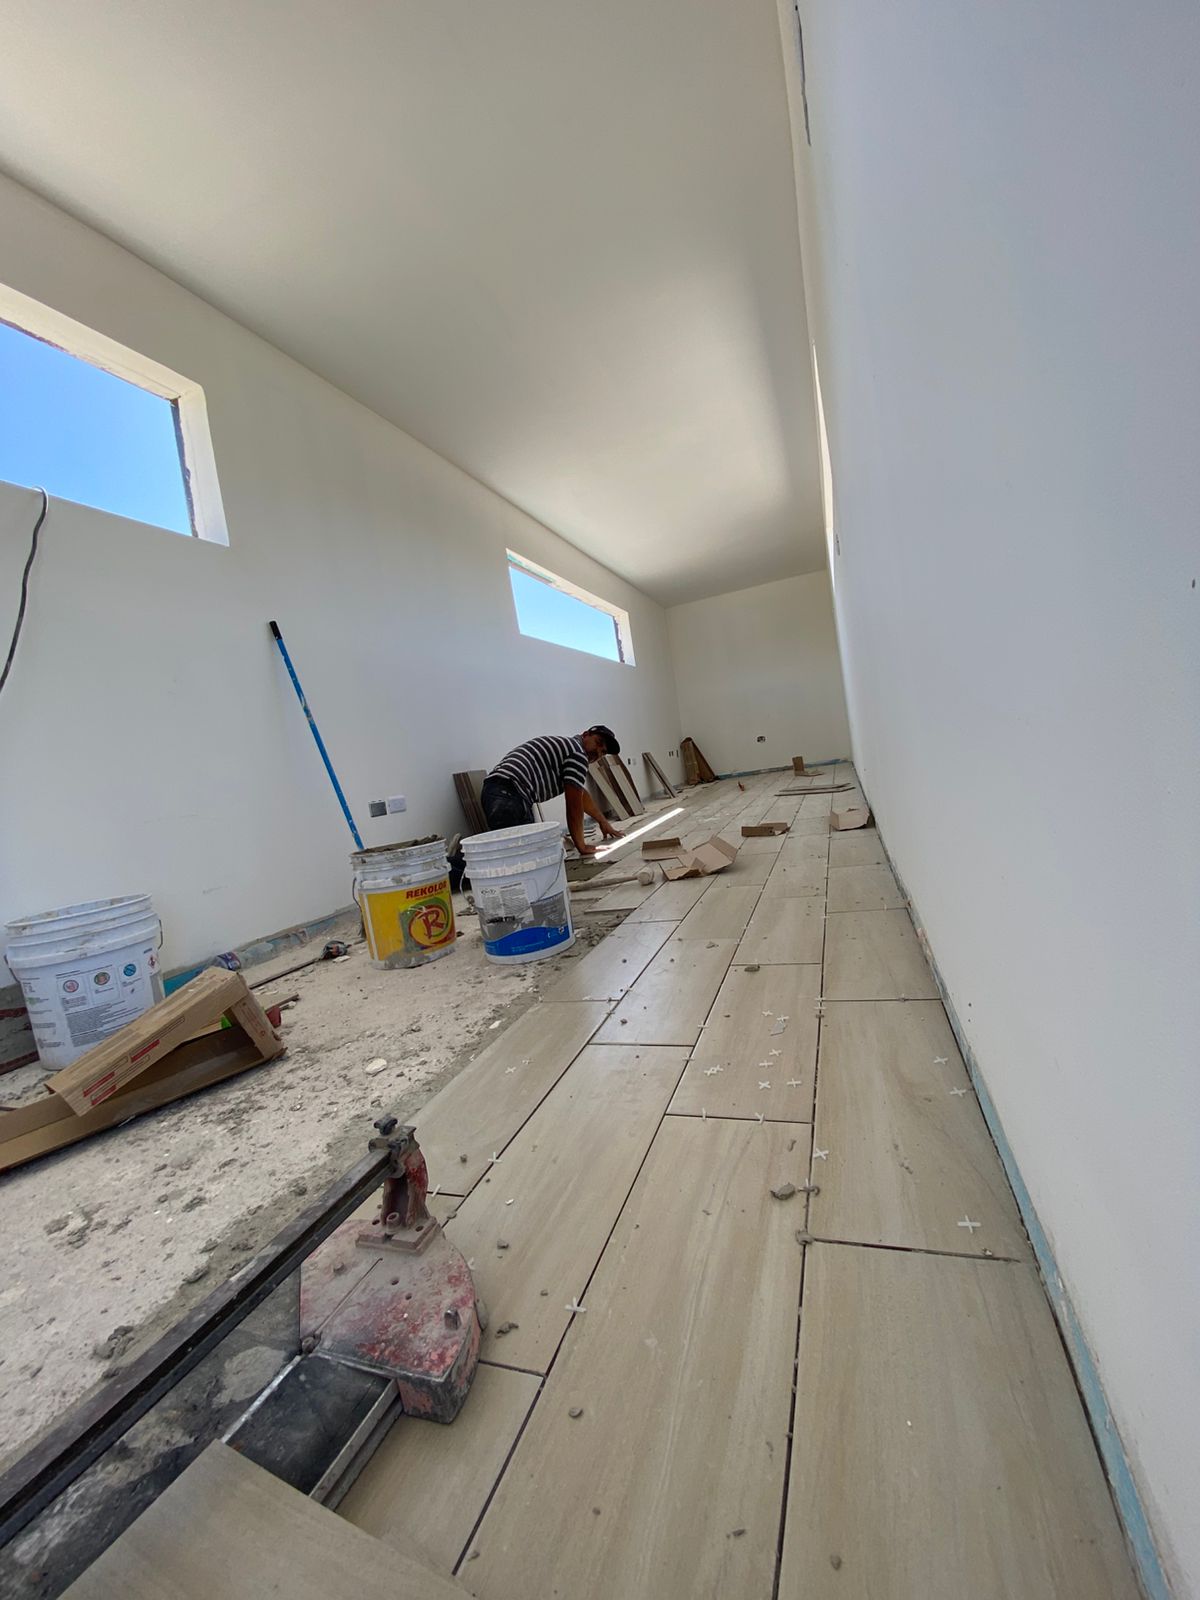
May–June 2026. 3 of the 14 High Cube 40-foot shipping containers at Campus CIAE are nearly done: cuts executed, R-18 sealed, drywall closed, walls painted, porcelain tile installed. Doors, AC and final windows pending. The work as evidence: 19 photos.
By Joaquín Corella Puente, Eng.
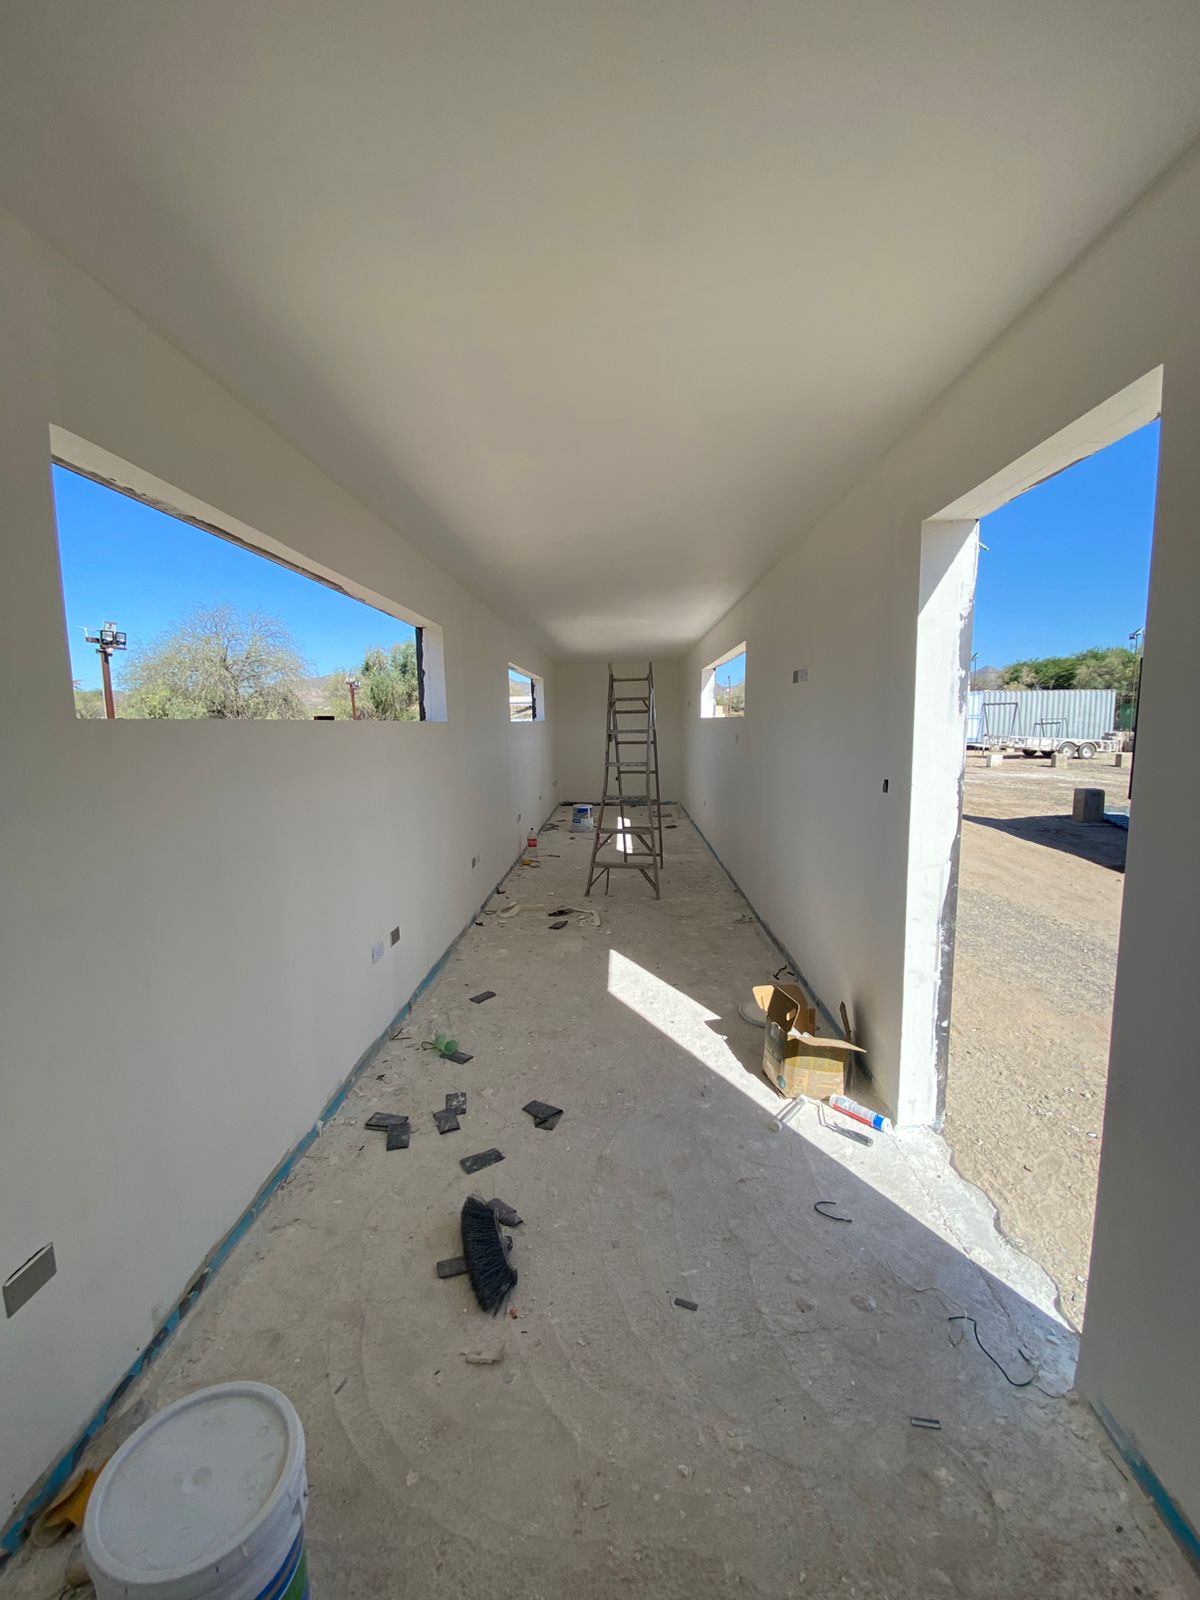
A month and a half into construction, 3 of the 14 High Cube 40-foot shipping containers for Campus CIAE are nearly complete. Only final doors, AC units, low-E glazing and interiors remain. This post isn’t a press release: it’s the work as evidence. 19 photos sorted by stage.
Important: the container intervention is being executed at a shop, not on-site. Once completed —cuts, R-18 insulation, MEP rough-in, drywall and finishes— each container will be transported to the Predio Benjamina in Hermosillo and set on the point concrete pads already waiting there. Site work (foundations, exterior urbanization) is advancing on a separate track.
The photos are not chronological either — they’re organized by stage because we have several containers advancing simultaneously at the shop. Within the same day in May, you’ll see fresh cuts and pieces with porcelain already laid.
1. The container before we touch it
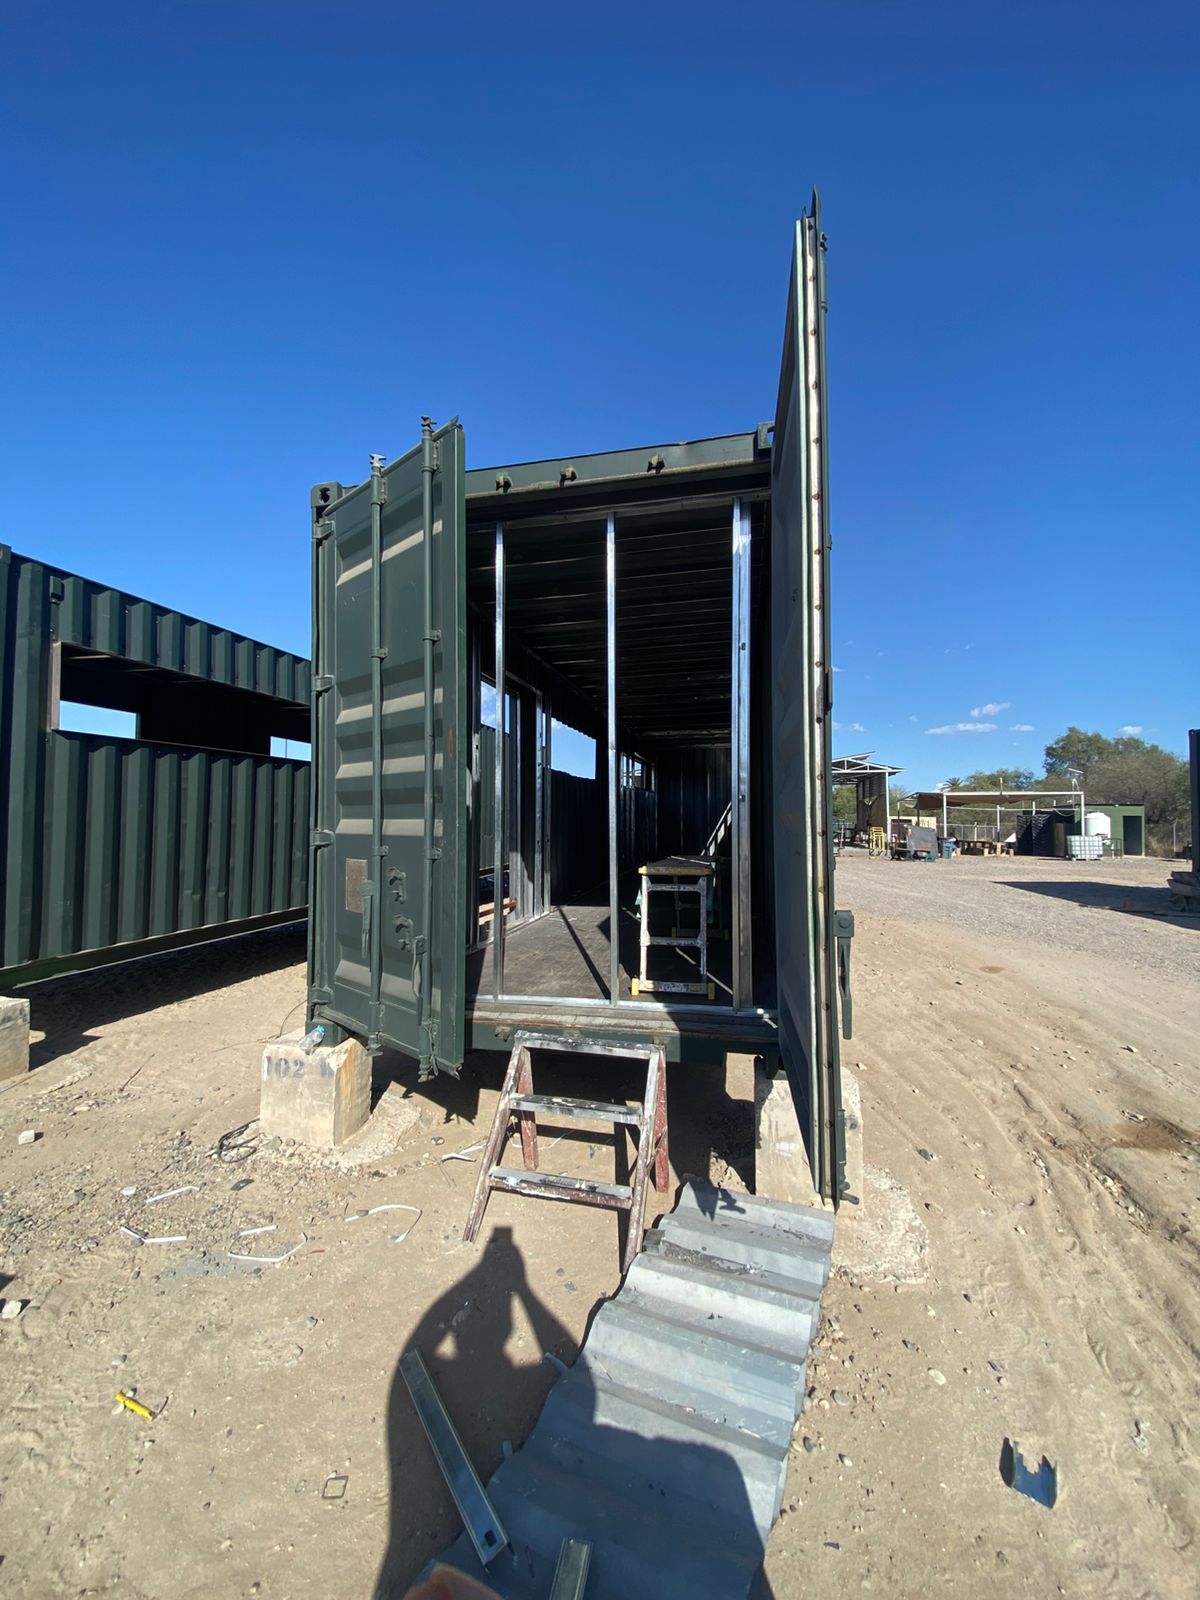
Each container enters the shop in its original color (military green, in this batch). The final destination at the site is point concrete pads — not a slab — that will allow natural stormwater infiltration to the subsoil. It’s the first LEED v5 decision underpinning credit SSc3 Stormwater Management without requiring an active cistern. For now, at the shop, containers rest on numbered work supports that identify each unit through the fabrication flow.
2. The cut that redesigns the box
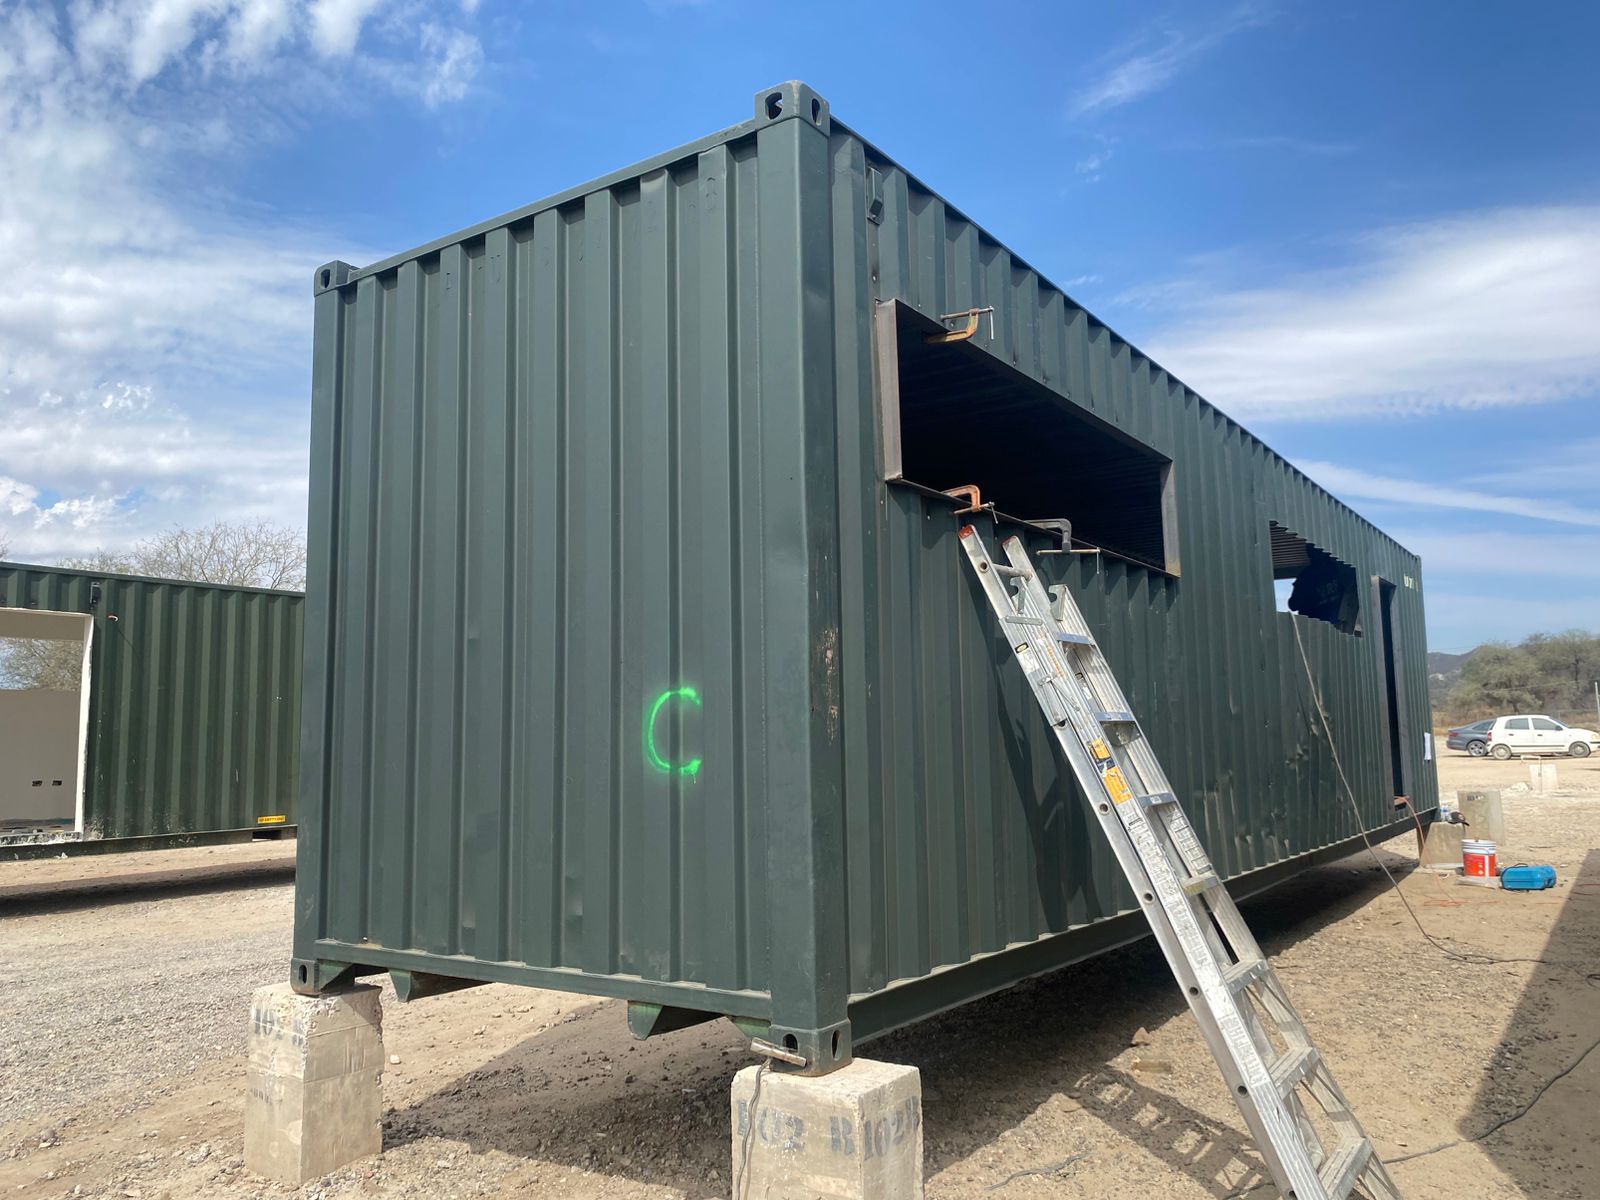
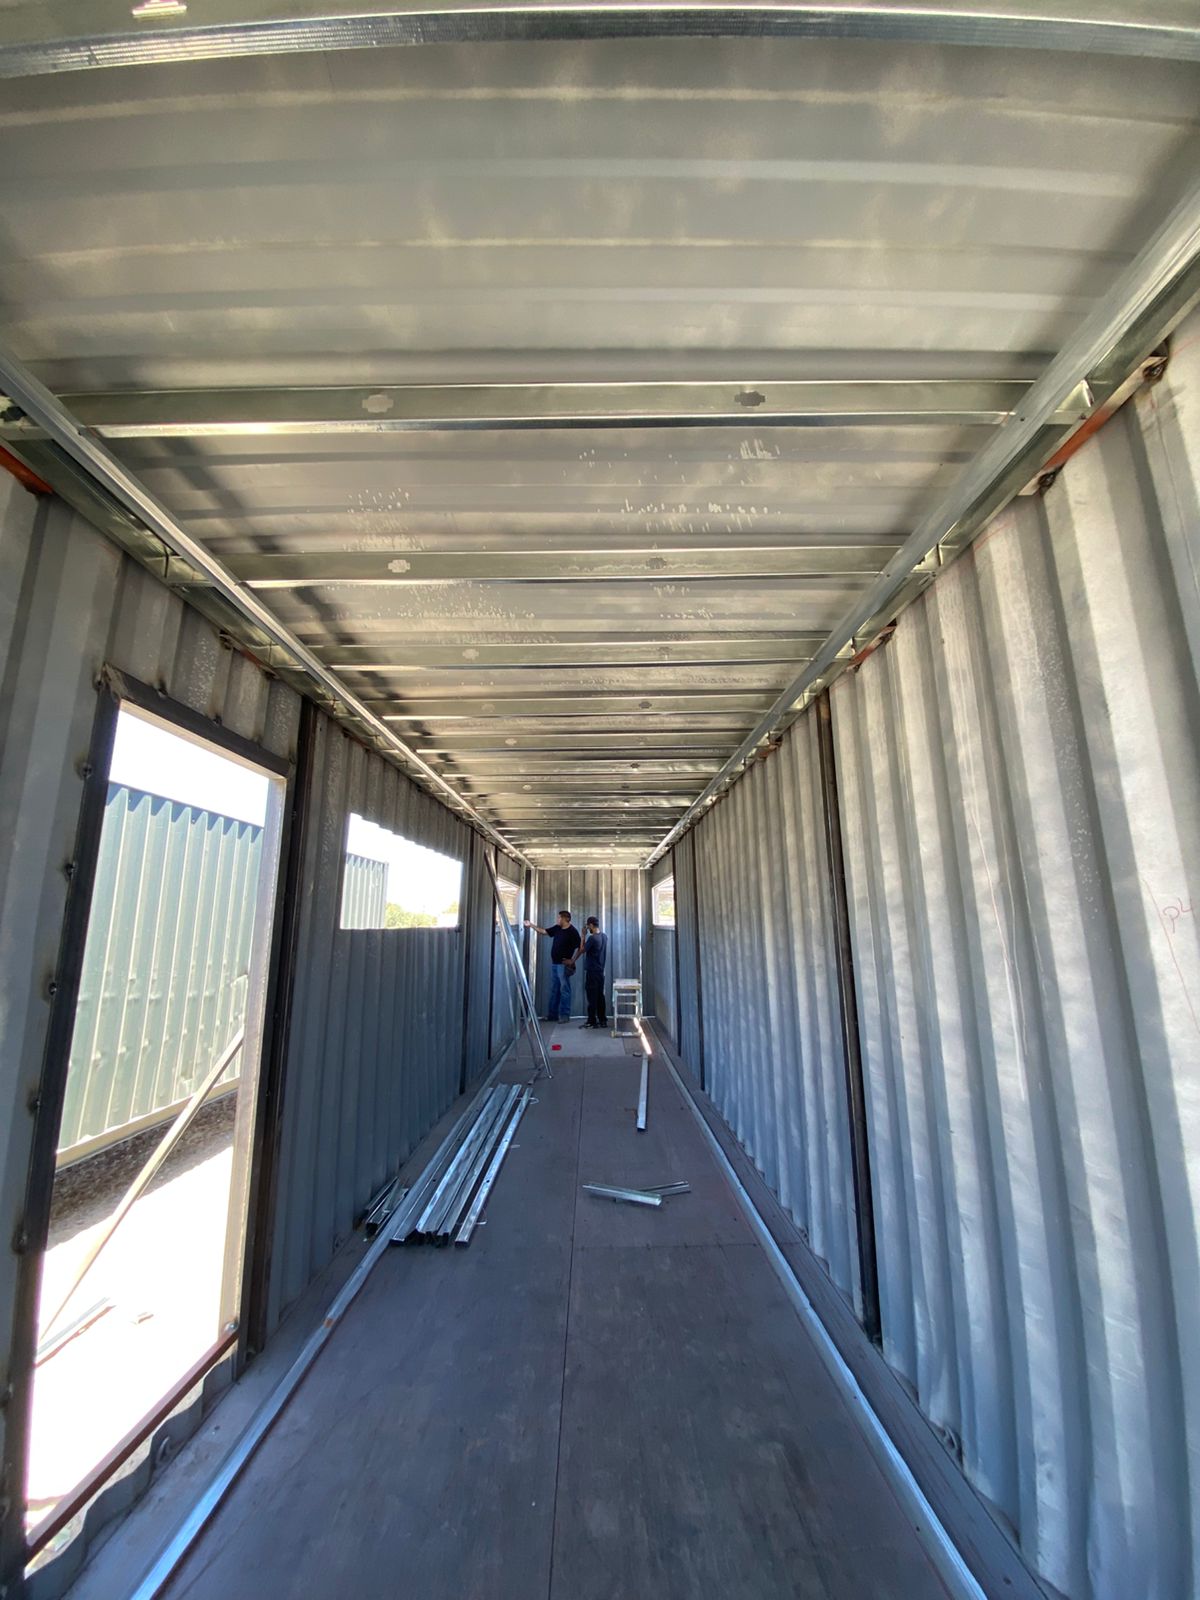
Next step: redesigning the box. Openings for horizontal windows, doors, service panels. The cut is done with plasma on the long side, preserving the container’s structural corners (which carry vertical and roof loads). Each opening’s width is sized by the dynamic energy model Tribo delivers as a LEED deliverable: not one window more, not one less.
3. The interior skeleton
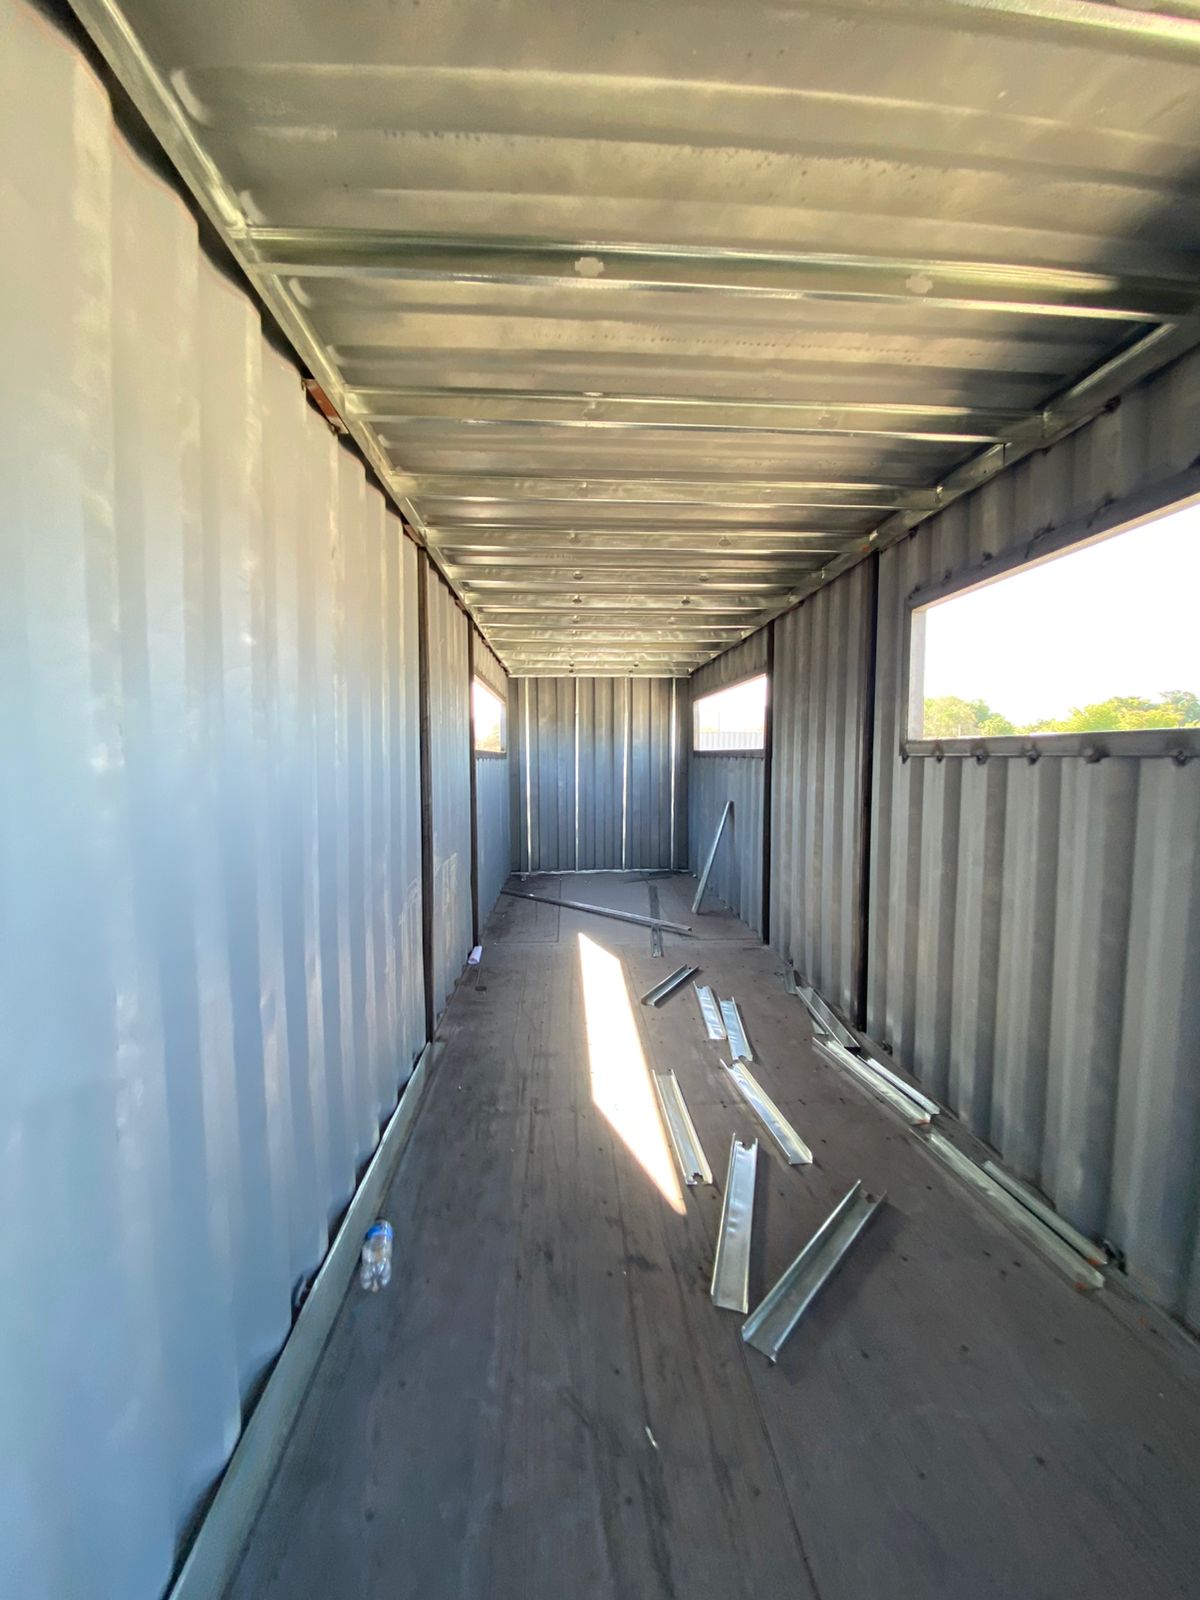
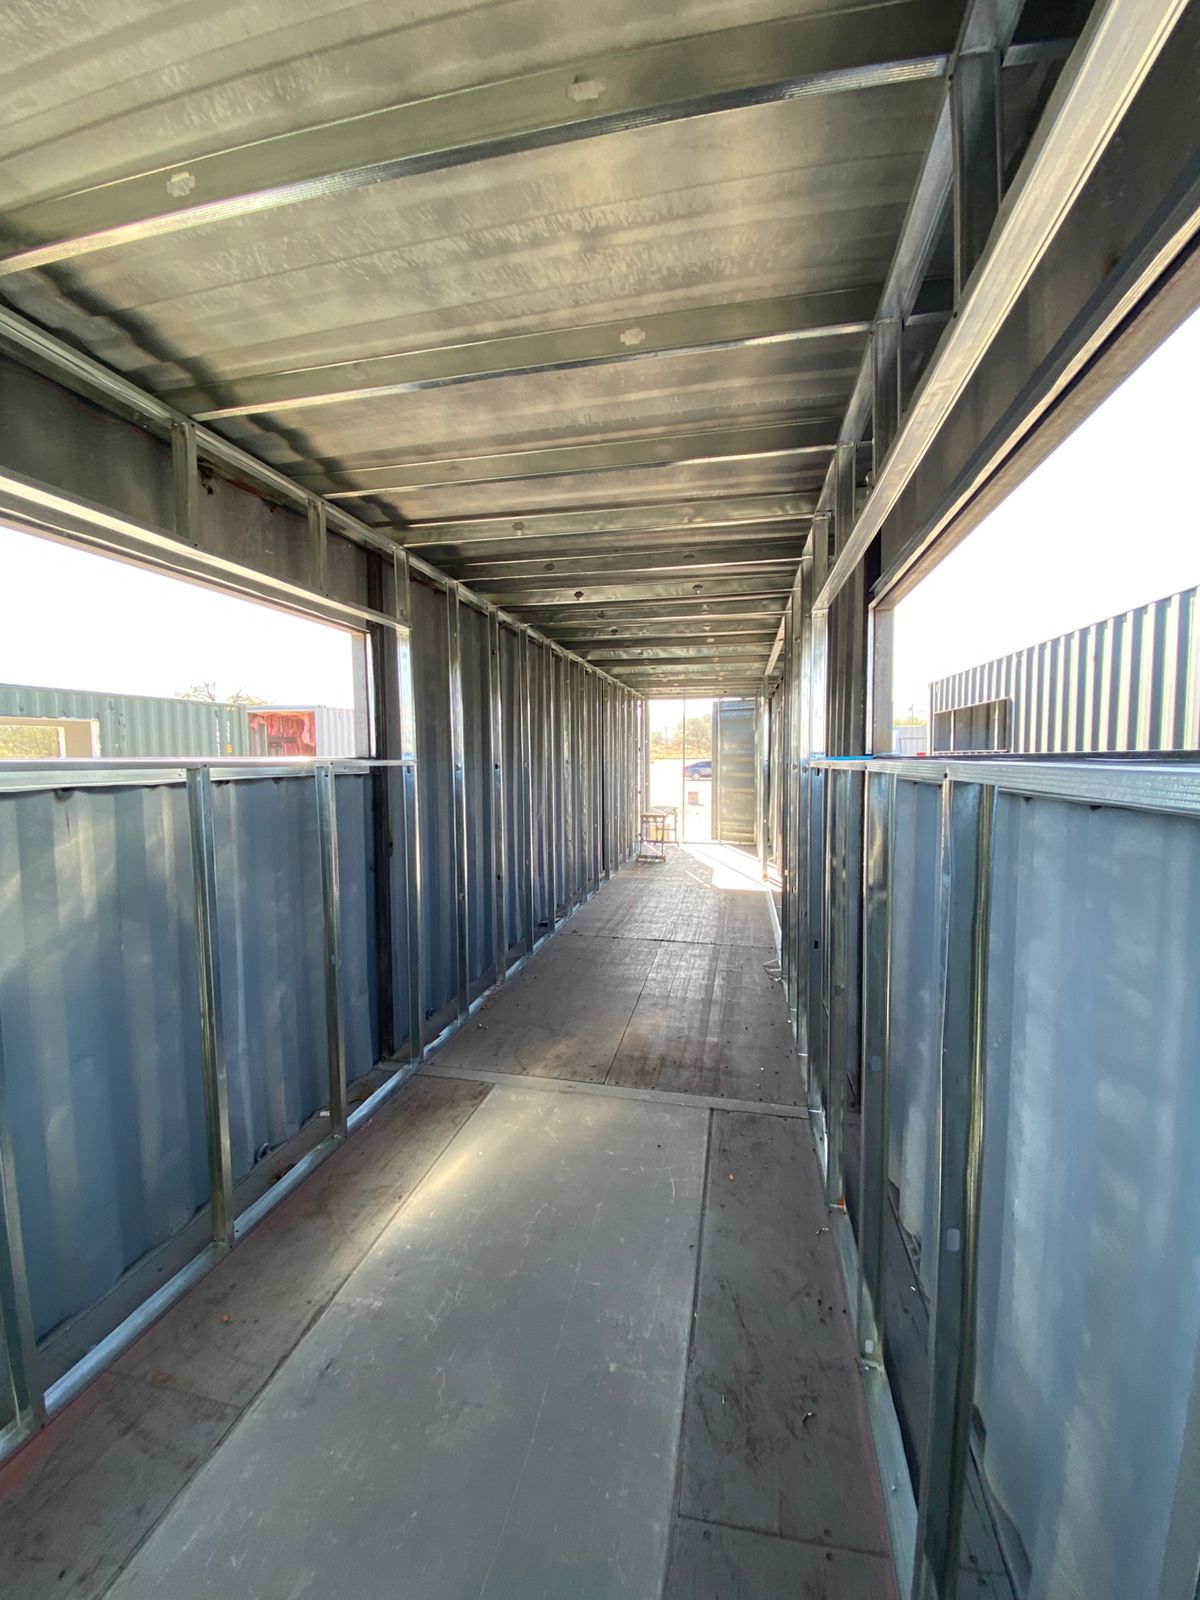
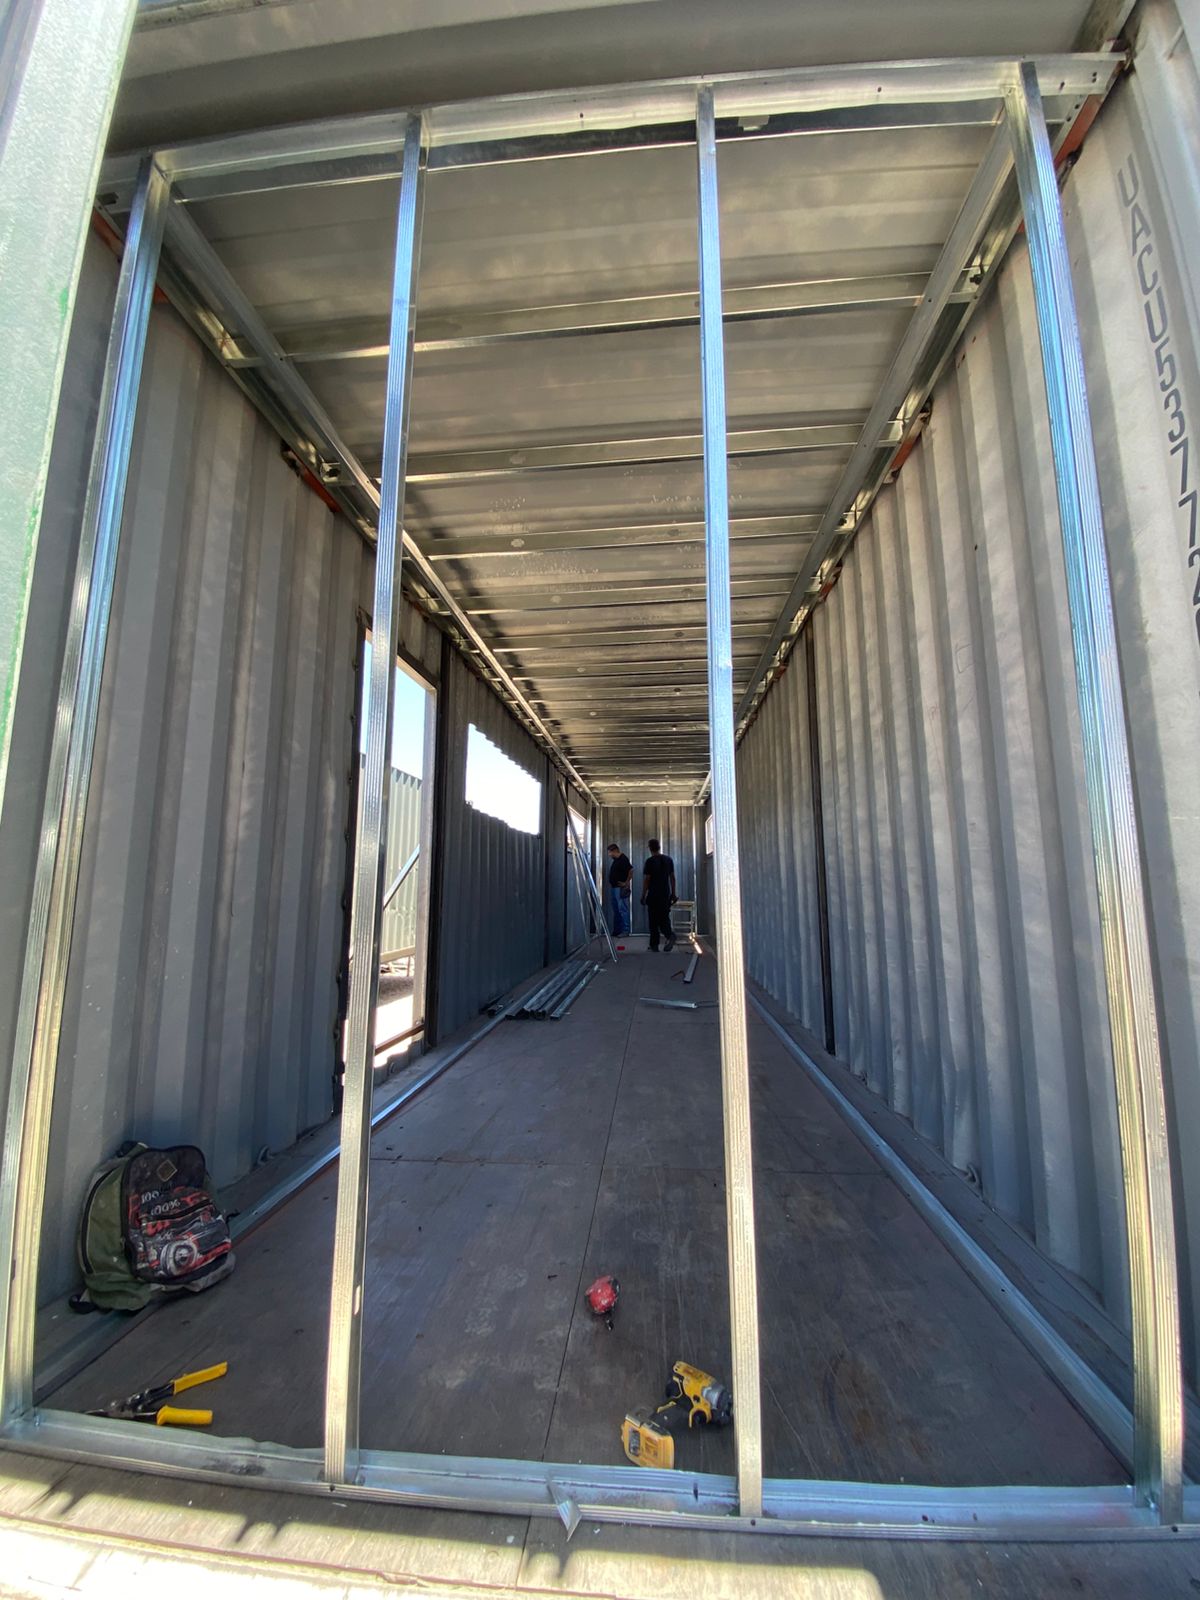
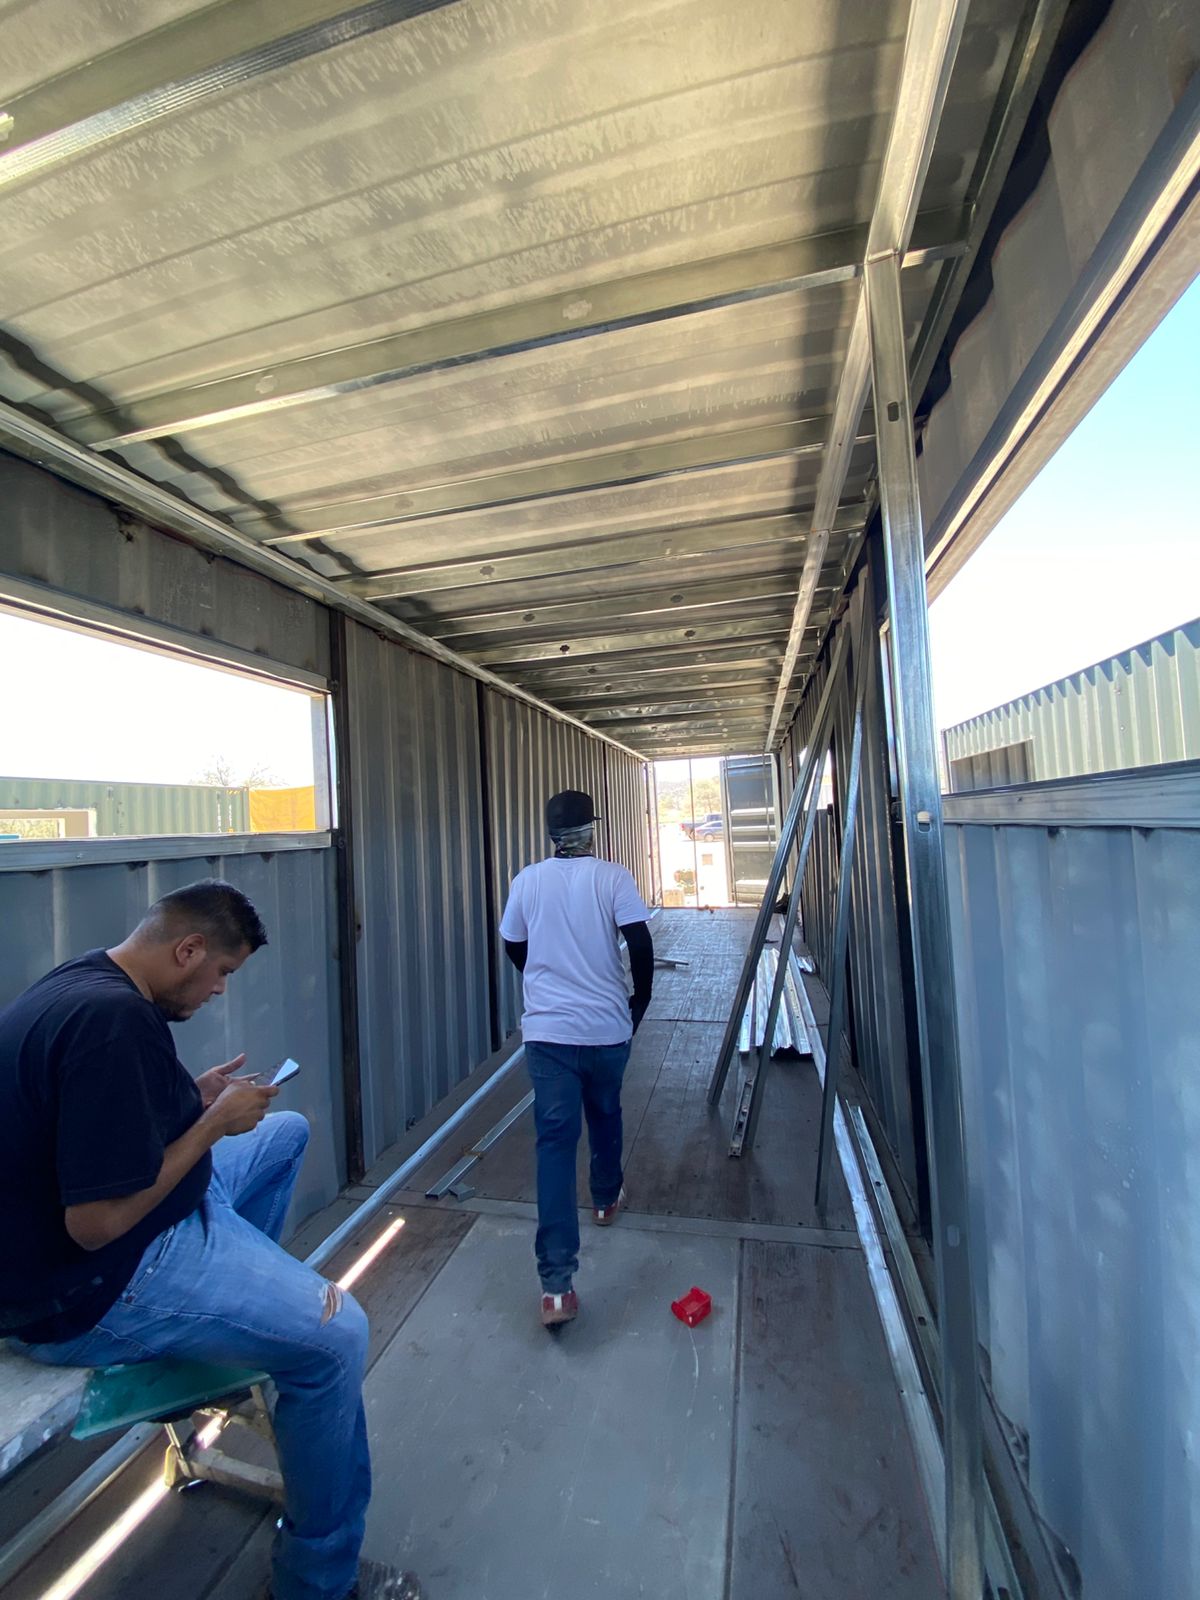
Before drywall, the interior structure of galvanized drywall profiles goes up (perimeter tracks at ceiling and floor, vertical studs every 40 cm). This skeleton defines the wall thickness and leaves the exact space for the R-18 insulation that follows. The container’s original floor (treated wood) is preserved during this phase to avoid damage to the steel sheet.
4. The R-18 insulation that seals the oven
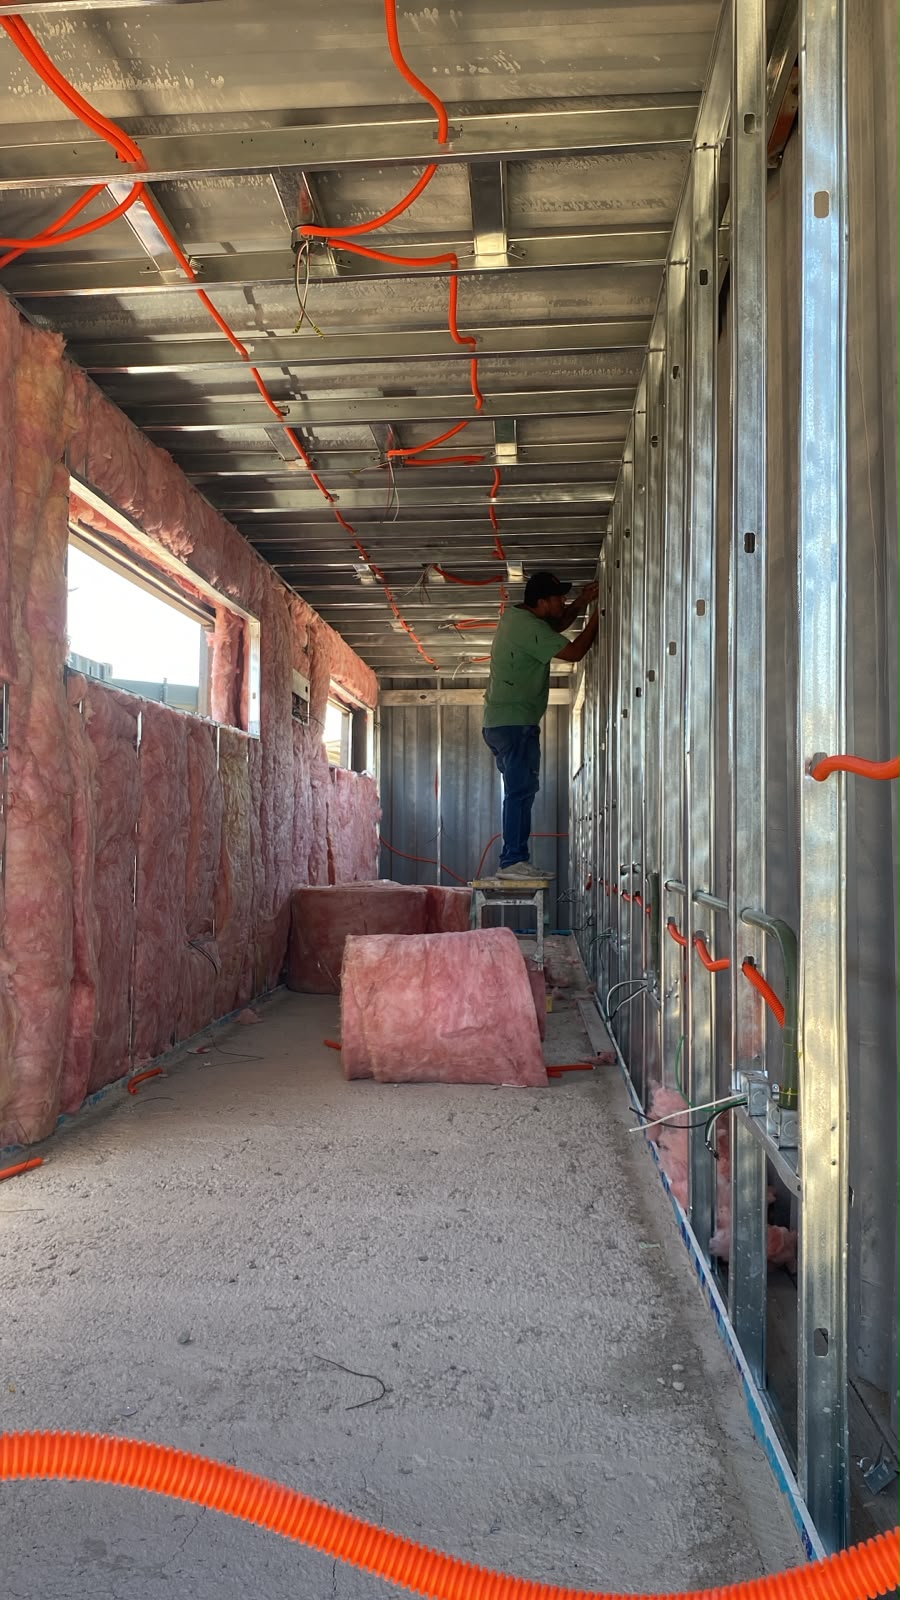
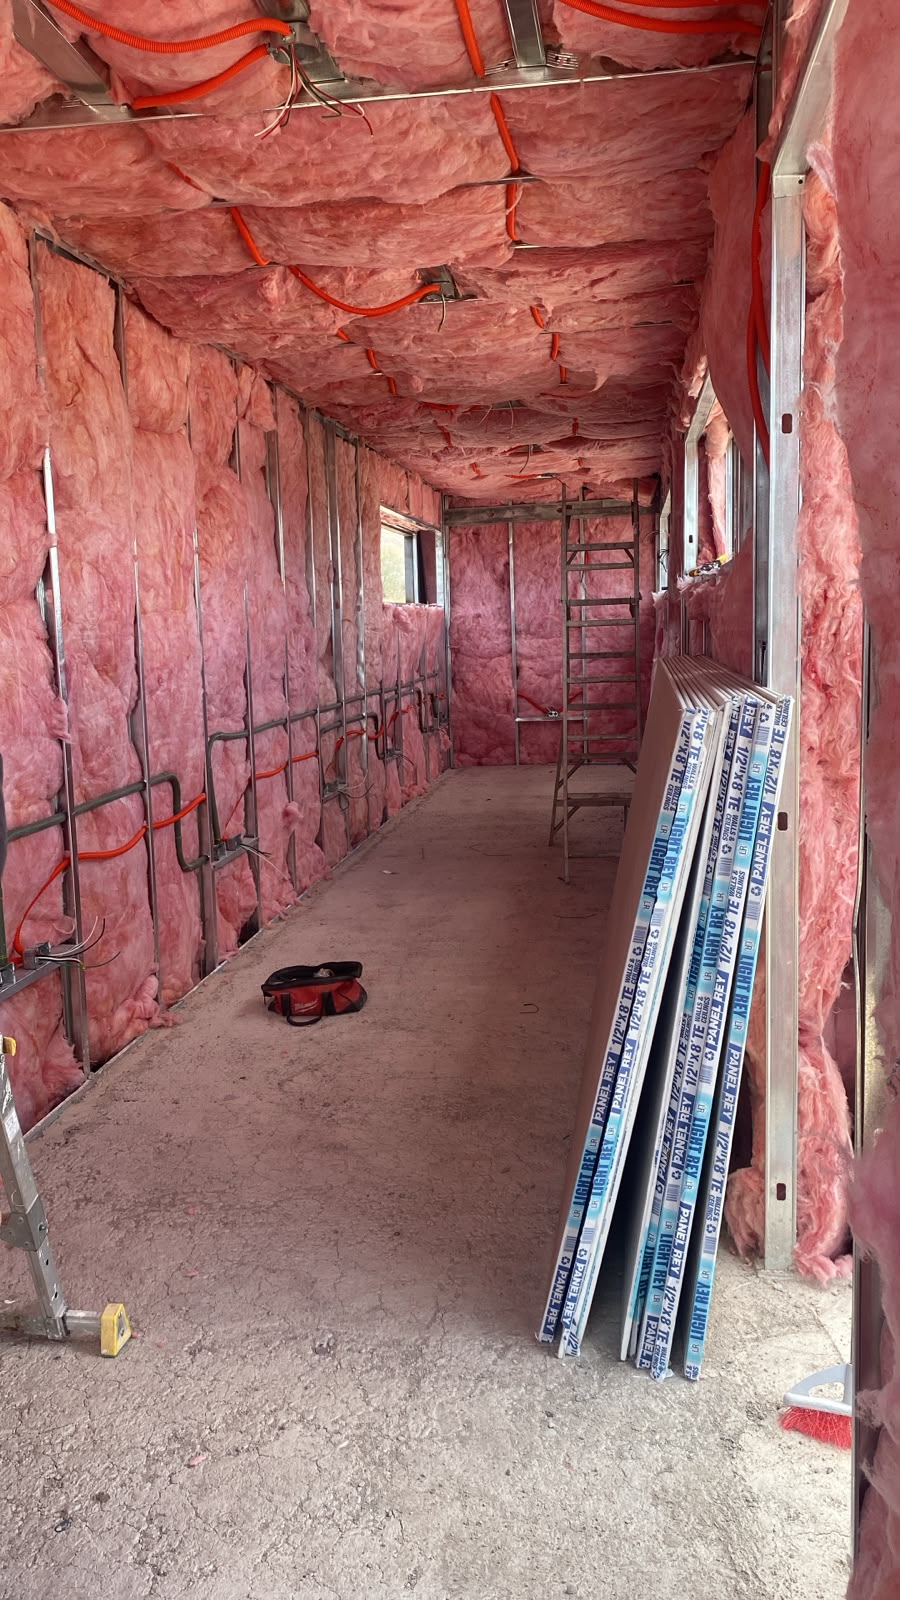
Hermosillo runs above 45 °C in July. Thermal insulation isn’t cosmetic — it’s the difference between a building consuming 60 kWh/m² and one consuming 30. We install R-18 fiberglass between galvanized profiles, in walls and ceiling. That’s 50 % above the NOM-020-ENER minimum (R-12). It underpins LEED credits EAc2 Peak Thermal Loads and EAc3 Enhanced Energy Efficiency together with the Low-E windows installed later.
5. The invisible installations
In parallel with the insulation, IED runs cables, flexible orange conduit and prepares lighting points, outlets and panel boards. This phase finishes before the drywall closure: once drywall is in, walls don’t reopen. Points are pre-wired with enough slack for fine adjustments during commissioning.
6. The drywall closure
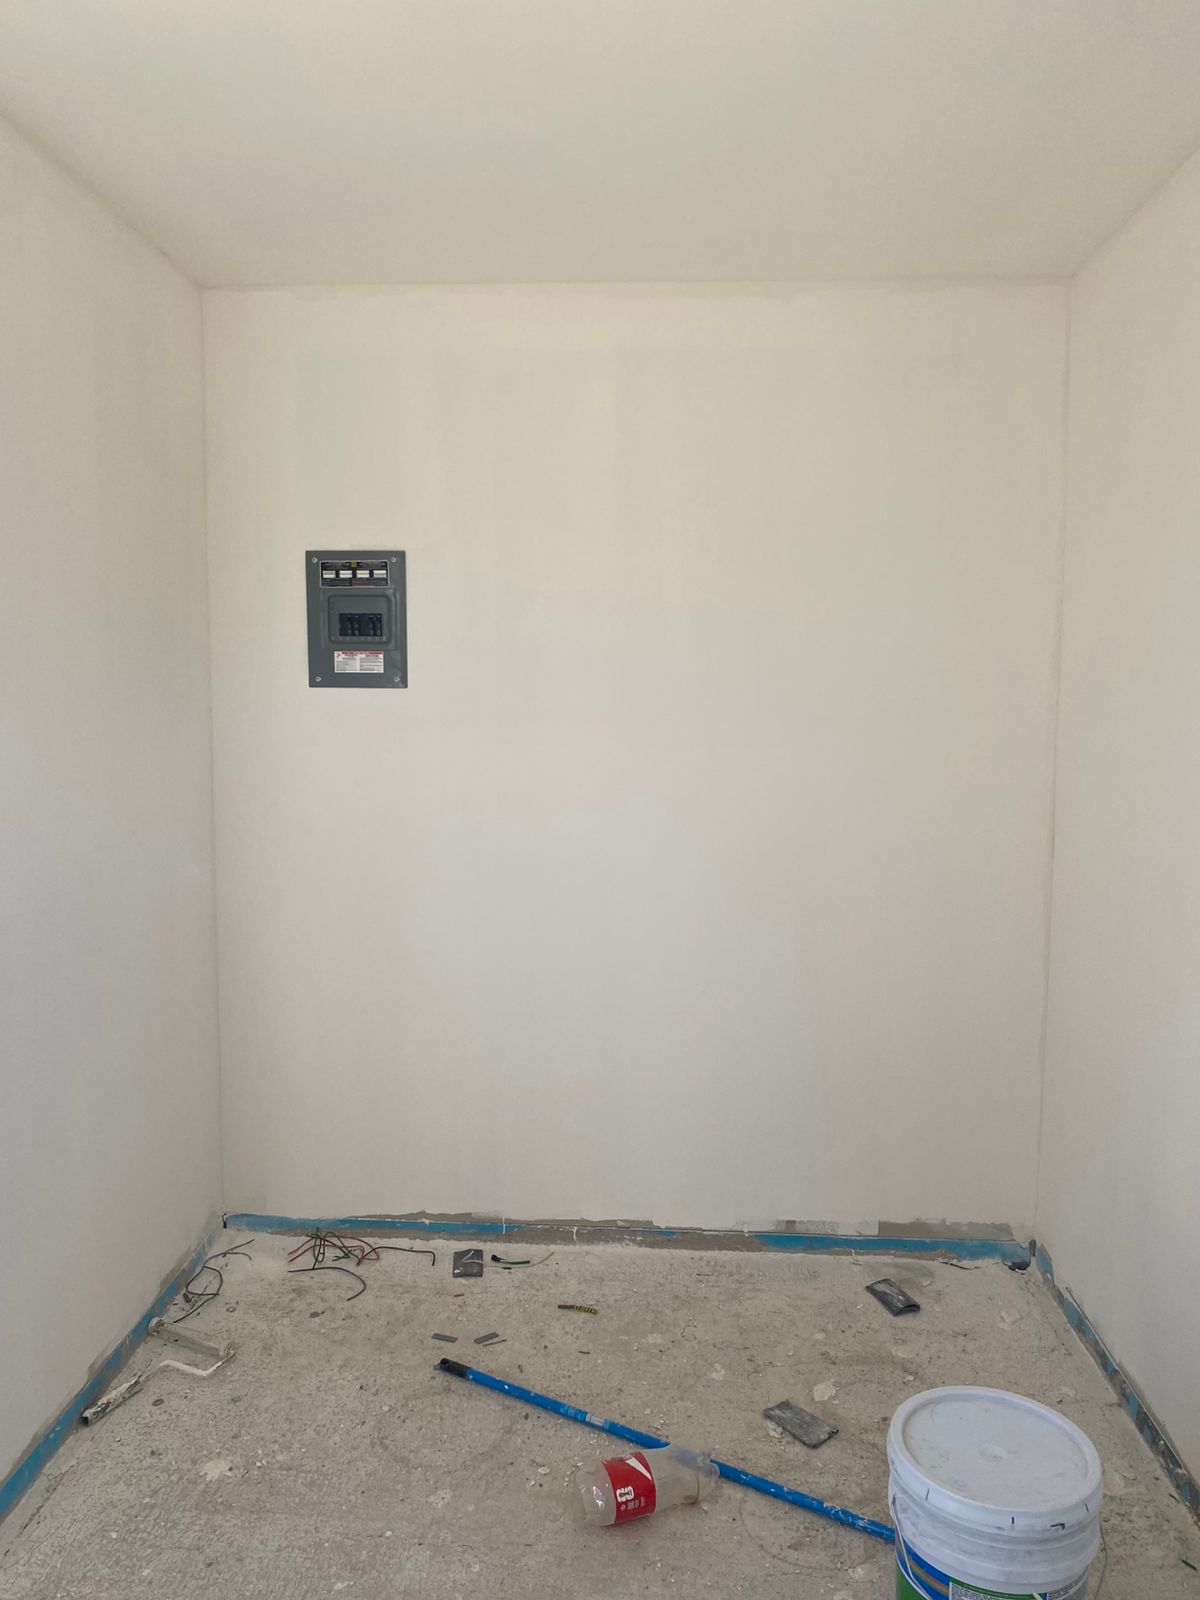
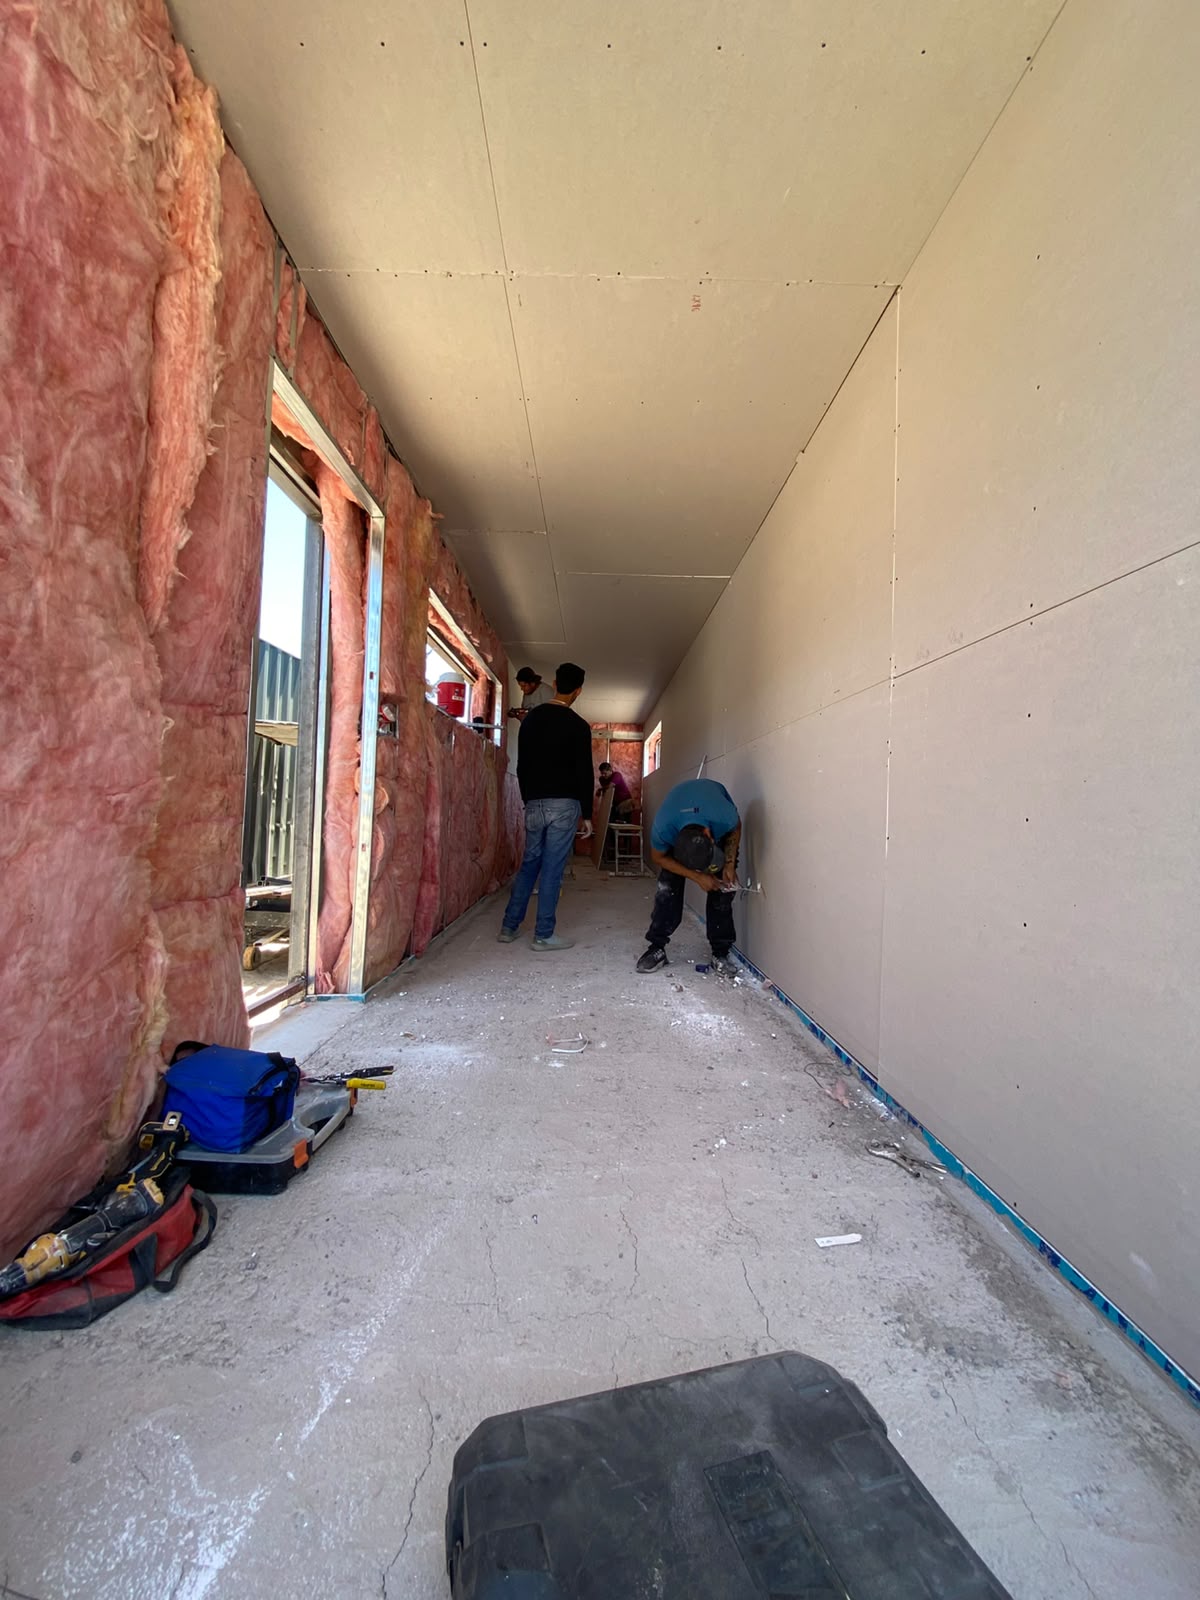
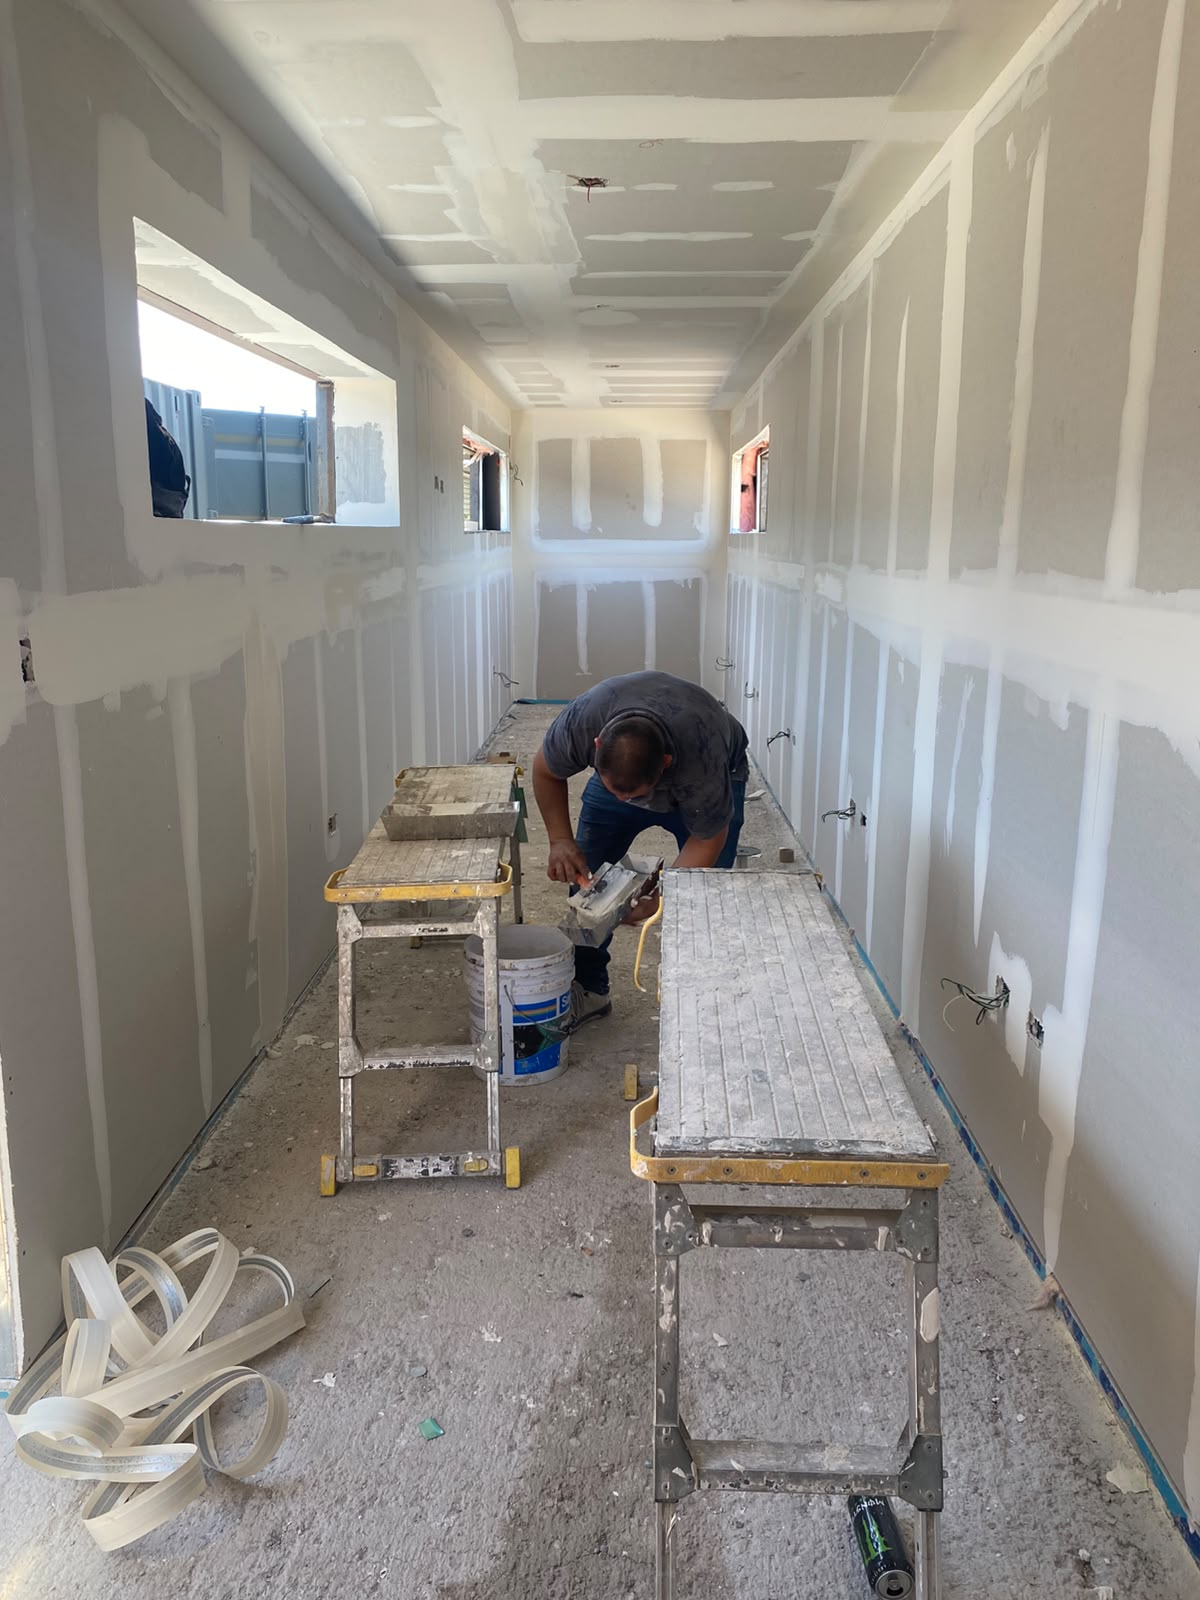
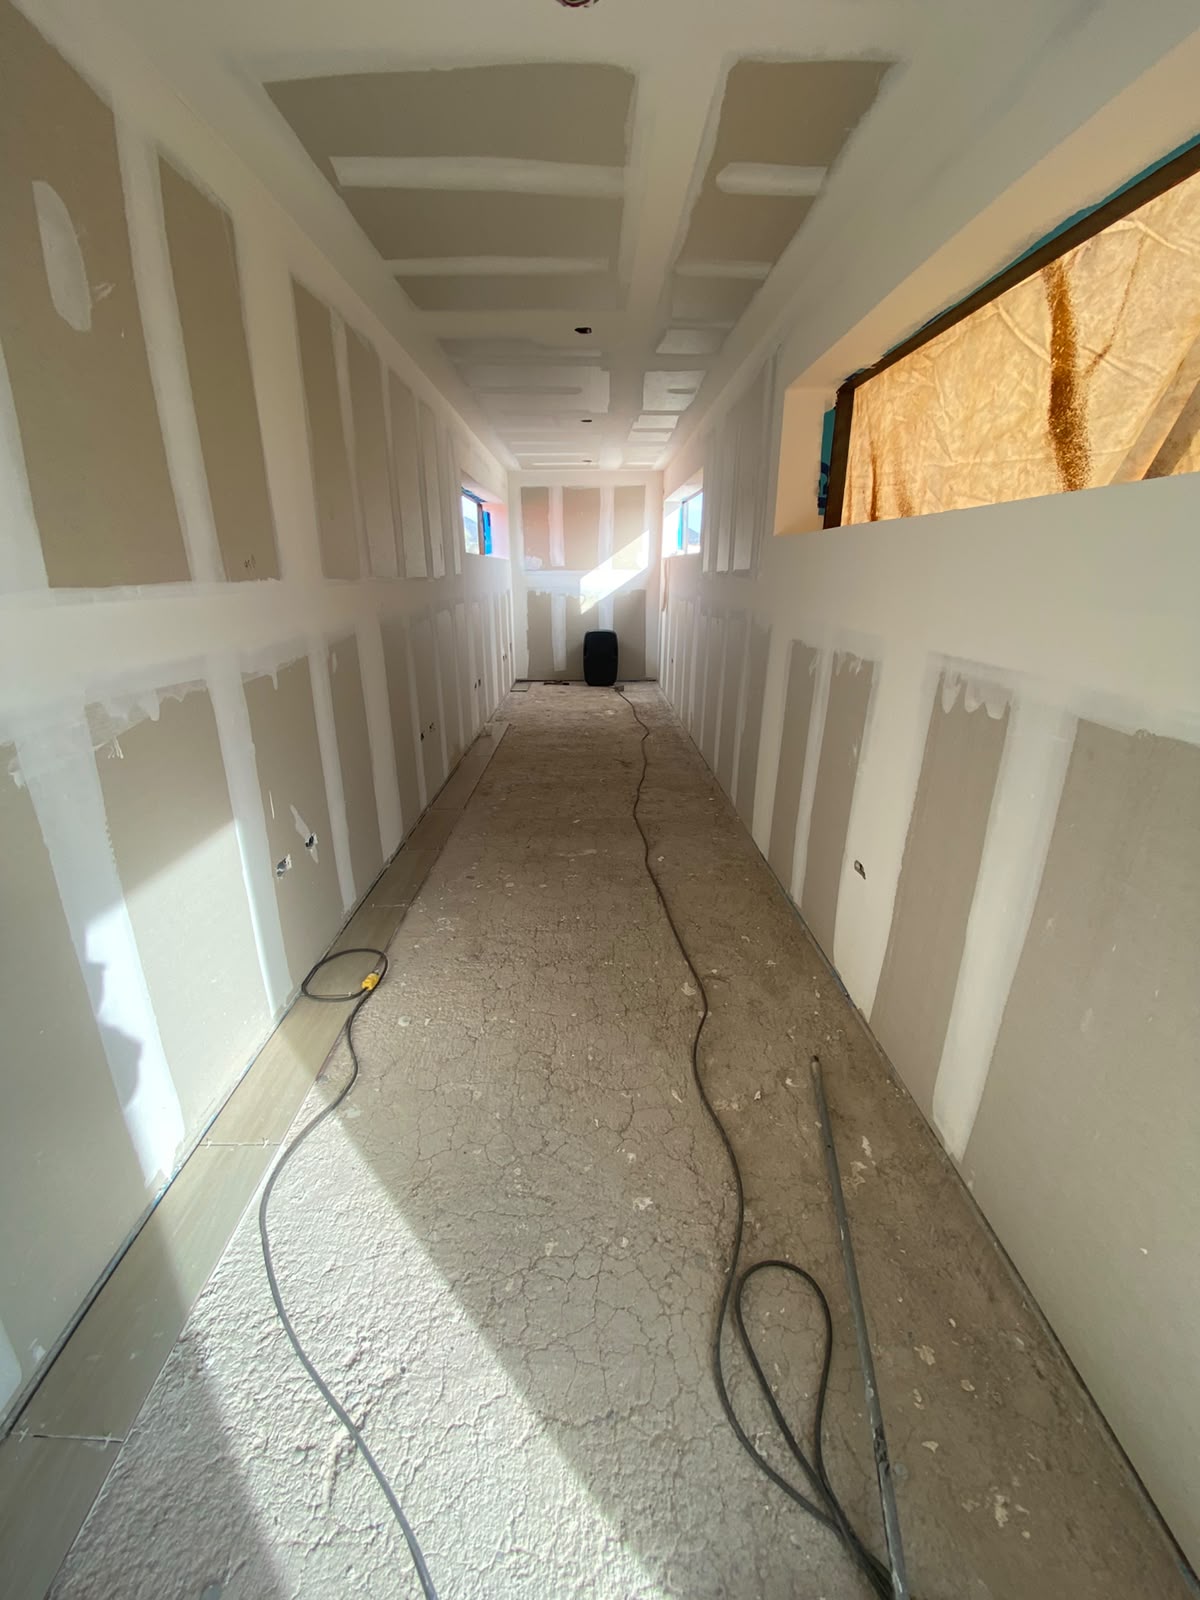
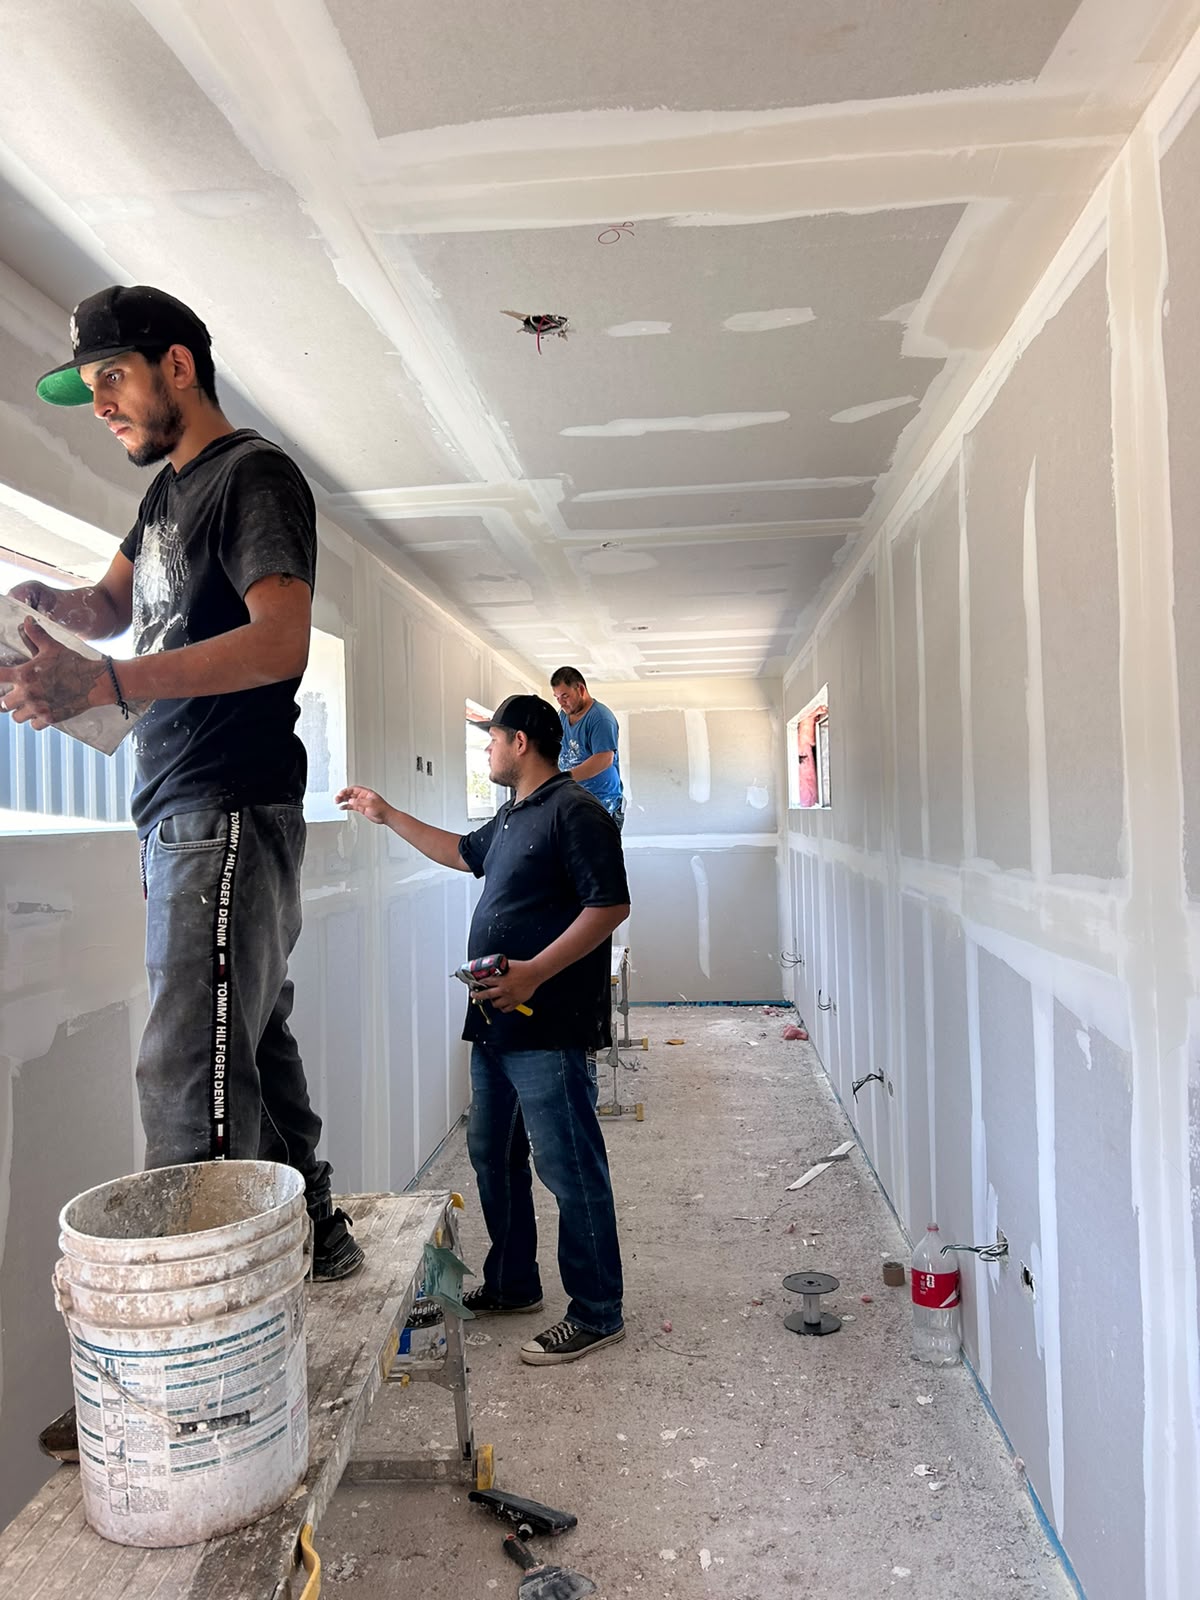
With insulation in and installations ready, the wall is closed with drywall panels screwed to the galvanized structure. Then comes taping and joint compound: panel joints receive tape and compound in several coats, then sanded smooth before painting.
7. Paint, windows and porcelain
Three details before module closure:
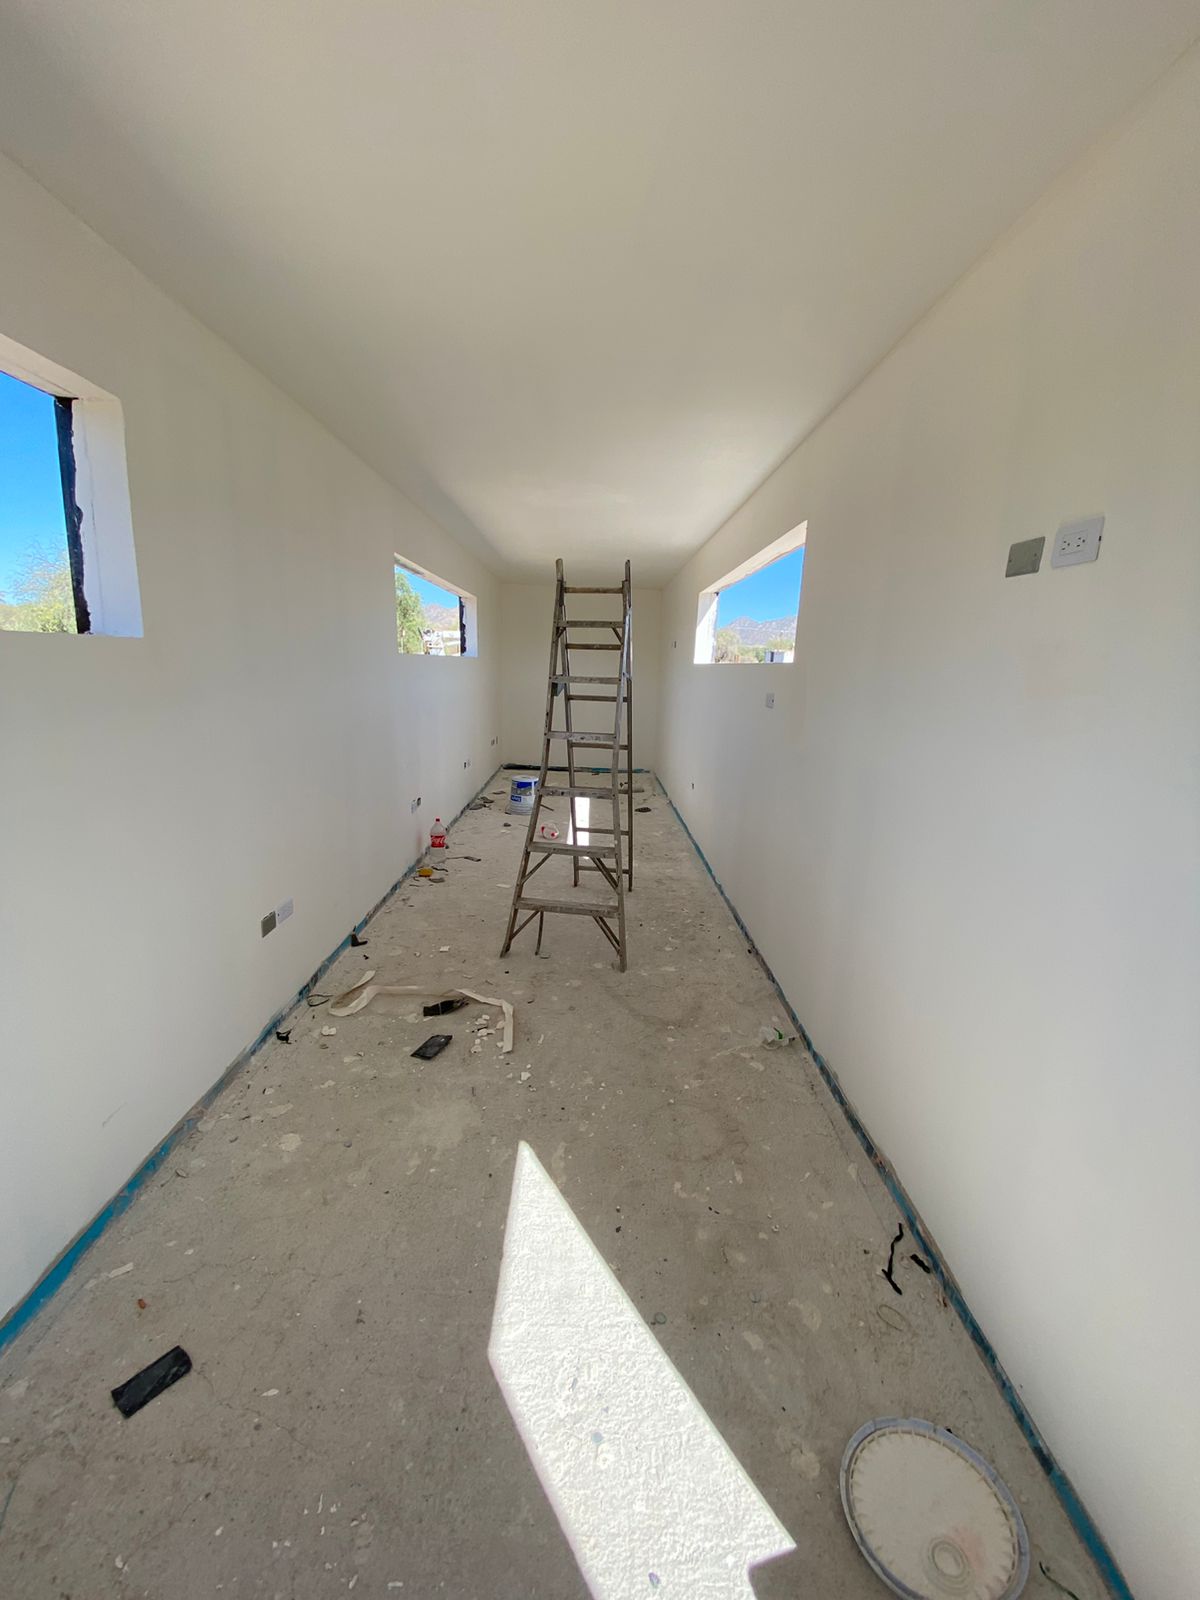
- Low-VOC paint in white — white is not an aesthetic decision but a thermal one: it maximizes internal reflection and reinforces the daylighting of EQc2 credits.
- Window openings protected with kraft paper until the final Low-E glazing arrives.
- Porcelain tile (wood-look) set with leveling spacers over cement-based adhesive. Resistant to industrial traffic, it keeps the “warm” interior reading without using actual wood (which degrades in this climate).
What remains
To close these 3 containers at the shop and ship them to the site ready to anchor, what’s left:
- Low-E window glazing (double-pane with low emissivity) — pending supplier delivery.
- Exterior doors and interior leaves — in production.
- Minisplit AC units, SEER 18 inverter with R-32 refrigerant — installation scheduled for July.
- Interiors: furniture, blinds, final luminaires, accessible signage.
After shop closure: transport to Predio Benjamina on flatbed, anchoring to the concrete pads, interconnection of installations with the campus utilities, and commissioning. In parallel, the remaining 11 containers are starting at the same shop. The schedule still targets civil works closure in February 2027 with pre-occupancy IAQ testing, and issuance of LEED v5 Platinum + EDGE Advanced in March 2027.
Why offsite fabrication
Building at a shop instead of on-site reduces total construction time, raises quality (controlled light, tooling, weather), and allows several containers to advance in parallel without saturating the site. By the time containers arrive at Predio Benjamina, they arrive essentially ready to occupy — only anchoring and utility tie-in remain. This is industrial prefabrication applied to LEED-grade construction.
Who’s making it happen
- Project Manager: Arch. Reyna Quiñónez Munguía (UNISON)
- Architectural design: Arch. Luar Petterson (Petterson · Kinetec)
- LEED consulting: Tribo Soluciones Sostenibles (4 LEED APs)
- Electrical engineering and installations: IED
- Operational coordination and spokesperson: Joaquín Corella Puente, Eng.
Next entry
July 2026: arrival of Low-E glazing, SEER 18 minisplit installation, and kickoff of the next 4 containers at the shop. If you want to see this in person, schedule a technical visit — we’ll coordinate a walkthrough at the shop (the 3 advanced containers are available) and/or at Predio Benjamina (concrete pads, urbanization, native landscaping in progress).
— Joaquín